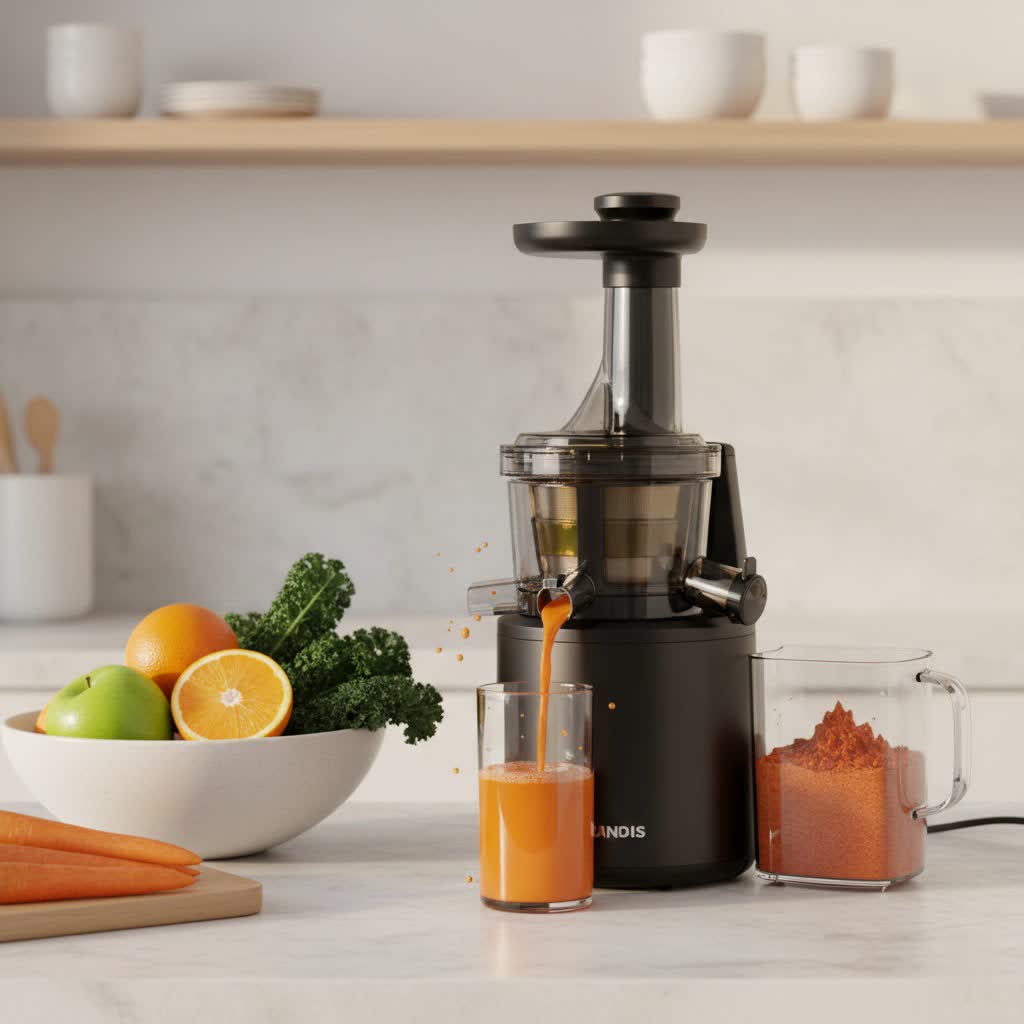
Just welcomed a new slow juicer into your kitchen and wondering if you’re truly getting the most out of your vibrant fruits and vegetables? Maximizing juice yield isn’t just about efficiency; it’s crucial for both nutrient retention and cost-effectiveness. A slow juicer, also known as a masticating juicer, is designed to gently press produce, minimizing heat and oxidation, which in turn preserves essential vitamins and enzymes. By understanding how to test your juicer’s performance, you can ensure you’re extracting every precious drop of goodness, making your juicing routine as nutritious and economical as possible. This guide offers a simple, hands-on approach to accurately measure your slow juicer’s extraction efficiency right in your own home.

The Importance of Juice Yield: Why It Matters
Understanding and optimizing your slow juicer’s yield is more than just a technical detail; it directly impacts your health and your wallet. Slow juicers excel at extracting juice with minimal heat, which is vital for preserving the delicate enzymes and heat-sensitive nutrients found in fresh produce. When your juicer operates efficiently, it means less oxidation, leading to a juice that stays fresh longer and retains its vibrant flavor and nutritional potency.
From a financial perspective, a higher juice yield means you’re getting more liquid gold from the same amount of produce. Over time, this translates to significant savings on your grocery bill. Imagine consistently getting 10-20% more juice from your organic carrots or leafy greens – those percentages add up quickly, making your healthy habit more sustainable. By actively testing and striving for optimal yield, you’re investing in both your health and smart resource management.
Preparing for Your DIY Juice Yield Test
Before diving into the juicing process, a little preparation goes a long way in ensuring accurate and comparable results for your yield test. Gather these essential tools and select your produce thoughtfully to create a reliable benchmark.
Essential Tools for Accuracy
- Digital Kitchen Scale: This is your most crucial tool. Look for one that measures in grams or ounces with precision, as even small differences can impact your yield calculations.
- Measuring Cups or Jug: For collecting and visually assessing your extracted juice.
- Your Slow Juicer: Ensure it’s clean and correctly assembled according to the manufacturer’s instructions. A well-assembled juicer performs best.
- Containers for Juice and Pulp: Use separate, lightweight containers that you can tare (zero out the weight) on your scale.
|
Our Picks for the Best Slow juicer in 2026
As an Amazon Associate I earn from qualifying purchases.
|
||
| Num | Product | Action |
|---|---|---|
| 1 | TUUMIIST Juicer Machines, Cold Press Juicer with 5.3" Extra Large Feed Chute Fit Whole Fruits & Vegetables Easy to Clean, High Juice Yield, BPA Free (Black) |

|
| 2 | TUUMIIST 3-in-1 Cold Press Juicer Machine, Smart Touch Masticating Juicers for Whole Fruit & Vegetable, 6.5" Wide Chute Slow Juicer for Nut Milk & Sorbet, High Yield, 100oz Large Capacity, Easy Clean |
|
| 3 | Nama J2 Cold Press Juicer – Self Feeding for Hands-Free Operation with Wide Mouth Hopper for Whole Recipe Loading, Zero Waste Masticating Juicer For More Juice, Less Pulp – Easy Cleanup & Assembly |
|
| 4 | Ninja NeverClog Cold Press Juicer | Powerful Electric Slow Masticating Juicer with Pulp Control | XL Capacity | 24 oz. Juice Jug & 36 oz. Pulp Container | Dishwasher Safe | Charcoal | 150W | JC151 |
|
| 5 | ECOSELF Juicer Machines with 3 Filters (For Juice/Sorbet/Nut Milk), With 6.0" Wide Mouth Hopper for Vegetables & Fruits, Slow Masticating Juicer Self Feeding, Juicer for Family Party, With Brush |
|
| 6 | Jocuu Slow Masticating Juicer Machines with Soft Hard Modes Easy to Clean Quiet Motor & Reverse Function, Cold Press Juicer for Fruit & Vegetable, 90% Juice Yield, with Brush & Recipes (Grey) |
|
| 7 | ECOSELF Cold Press Juicer - Large Mouth Hopper For Whole Fruits & Vegetables - Juicer Machines with Hands-Free Design - Slow Masticating Juicers High Juice Yield With Pusher - For Party Gathering |
|
| 8 | EanOruus Juicer Machines, 3-in-1 Cold Press Juicer with 6.5" Extra Large Chute, 100oz Large Capacity, AC Motor, Makes Juice, Nut Milk & Sorbet, Premium Gray |
|
| 9 | Juicer Machines with 5.8" Large Chute, 2-in-1 Cold Press Juicer for Whole Vegetables Fruits 400W, Masticating juicer Easy to Clean Juice Extractor Machine for Making Nut Mike, Juice, Premium Gray |
|
| 10 | Godspeeds Juicer Machines with 5.8" Large Feed Chute, Slow Masticating Cold Press Juicer for Whole Fruits & Vegetables, Easy to Clean Design, High Juice Yield Home Juicer for Daily Wellness |
|
Choosing Your Produce for Testing
To get a comprehensive understanding of your juicer’s capabilities, it’s best to test a variety of produce types. Each kind of fruit or vegetable challenges different aspects of a slow juicer’s design.
- Oranges: The Citrus Benchmark
- Oranges are excellent for an initial test. They are relatively easy to juice and provide a good baseline for how well your juicer handles softer, high-water-content produce. They help assess the juicer’s ability to separate pulp from liquid effectively.
- Carrots: The Fibrous Challenge
- Carrots are robust and fibrous, making them ideal for testing your slow juicer’s motor strength and its ability to process harder ingredients. A high yield with carrots indicates efficient mastication and a strong press. Pay attention to the dryness of the pulp, as this is a key indicator of thorough extraction.
- Leafy Greens (Kale, Spinach, Celery): The Delicate Test
- Slow juicers are particularly prized for their efficiency with leafy greens, which often prove difficult for centrifugal juicers. Testing with kale, spinach, or celery reveals how well your juicer handles delicate, stringy fibers. A good yield here suggests minimal waste and maximum nutrient extraction from these superfoods.
Standardizing Your Test for Reliable Results
Consistency is key for accurate comparisons.
- Consistent Amounts: Always use the same weight of produce for each test (e.g., 500 grams or 1 pound). This allows for direct comparison of yield percentages.
- Fresh and Similar Ripeness: Opt for fresh, firm produce. Overripe or wilting produce will naturally yield less juice. Try to use produce of similar ripeness levels for each test batch.
- Appropriate Pre-cutting: Cut your fruits and vegetables into pieces that fit comfortably into your juicer’s feed chute, as recommended by your juicer’s manual. This prevents jamming and ensures smooth operation.
Step-by-Step DIY Juice Yield Testing Protocol
Now that you’re prepared, let’s walk through the simple steps to test your slow juicer’s efficiency.
- Preparation: Begin by thoroughly washing your chosen produce. Place it on your digital kitchen scale and record the exact “Initial Produce Weight” in grams or ounces. This is your starting point for calculation.
- Juicing Process:
- Assemble your slow juicer according to the manufacturer’s instructions.
- Place a pre-weighed container under the juice spout and another under the pulp spout. Make sure to “tare” your scale with these empty containers to subtract their weight later.
- Feed the prepared produce slowly and consistently into the juicer. Avoid pushing too quickly or overstuffing the chute, as this can reduce efficiency and potentially jam the machine. For fibrous greens, you might consider alternating them with harder items like carrots to help push them through.
- Allow the juicer to extract all the juice and expel all the pulp.
- Measurement:
- Once juicing is complete, carefully remove the juice container. Weigh it on your digital scale. Subtract the weight of the empty container (which you tared earlier) to get the “Total Juice Weight.”
- Do the same for the pulp container. Weigh it and subtract the empty container’s weight to get the “Total Pulp Weight.”
- Calculation: With your recorded weights, you can now calculate your juicer’s yield percentage:
- Juice Yield Percentage (%): (Total Juice Weight / Initial Produce Weight) * 100
- For example, if you started with 500 grams of carrots and extracted 375 grams of juice, your yield would be (375 / 500) * 100 = 75%.
- Pulp Dryness Assessment: Beyond the numbers, visually inspect the expelled pulp. Is it notably dry and crumbly, or does it still feel wet and moist? Drier pulp is a strong indicator of superior extraction and a high-performing slow juicer.
Interpreting Your Results: What’s a Good Juice Yield?
After completing your test, you’ll have a yield percentage. But what do those numbers actually mean? Understanding typical benchmarks and influencing factors will help you interpret your juicer’s performance.
General Yield Benchmarks:
While yields can vary based on produce freshness, variety, and even your juicing technique, here are some general ranges for a well-performing slow juicer:
- Oranges: Expect a yield in the range of 60-75%.
- Carrots: Good slow juicers typically extract 65-80% juice from carrots.
- Leafy Greens (e.g., Kale, Spinach, Celery): This can vary more, but a yield of 50-70% is generally considered excellent for leafy greens, which are notoriously challenging for less efficient juicers.
Factors Affecting Your Yield:
- Produce Quality and Freshness: Fresher, firmer produce with higher water content will always yield more juice. Older or wilting produce has already lost some moisture, leading to a lower yield.
- Juicer Model and Design: Not all slow juicers are created equal. Different auger designs, motor powers, and screen sizes can affect extraction efficiency. Premium slow juicers often boast higher yields.
- Operator Technique: How you feed produce matters. Slow, steady feeding, and proper pre-cutting (as discussed above) prevent the motor from straining and ensure maximum extraction.
- Pulp Consistency: A truly efficient slow juicer will produce very dry pulp. If your pulp is still wet and soggy, it indicates that more juice could have been extracted.
Troubleshooting Low Yield:
If your results are lower than expected, don’t fret! There are a few things you can check:
- Review Your Technique: Are you feeding too fast? Overstuffing the chute? Try slowing down.
- Check for Clogs: Disassemble and inspect the auger, screen, and pulp outlet for any blockages. Even small amounts of trapped pulp can hinder flow.
- Ensure Proper Assembly: Double-check that all parts are fitted correctly and securely. A loose seal or incorrectly placed component can affect performance.
- Consider Produce Choice: Are you using very dry or low-water-content ingredients? Experiment with produce known for higher juice yields.
Maximizing Your Slow Juicer’s Performance
Achieving optimal juice yield isn’t just about the juicer; it’s also about your technique and ongoing care. Here’s how to ensure you’re always getting the most out of your slow juicer.
Proper Produce Preparation
- Chop Fibrous Ingredients: For items like celery, ginger, or fibrous greens, cut them into smaller, manageable pieces (1-2 inches) before feeding. This helps the auger grip and process them more effectively, preventing stringy material from wrapping around the auger or clogging the screen.
- Alternate Hard and Soft Ingredients: When juicing a mixed batch, alternate between hard and soft produce. For example, follow a handful of spinach with a piece of carrot. The harder produce helps push the softer, pulpy items through the screen, improving extraction.
Feeding Technique
- Feed Slowly and Steadily: Resist the urge to rush. Slow juicers are designed for a gradual process. Feeding ingredients slowly allows the auger sufficient time to chew and press the produce thoroughly.
- Don’t Force Ingredients: Never push down with excessive force using the tamper. Let the juicer do the work. Forcing produce can strain the motor and reduce efficiency.
- Utilize the Reverse Function: If you notice the juicer struggling, the motor straining, or juice flow slowing significantly, use the reverse function for a few seconds. This can dislodge any stubborn pieces that are causing a jam, often clearing the path for smooth juicing to resume.
Essential Maintenance for Longevity and Efficiency
- Clean Immediately After Use: This is perhaps the most important tip. Disassemble your juicer components and rinse them under running water as soon as you’re done. Pulp, especially from fibrous greens, can dry and harden quickly, making cleaning much more difficult later.
- Clear the Filter Screen: Pay special attention to the fine mesh screen, as this is where pulp often accumulates. Use the specialized cleaning brush (usually included with your juicer) to scrub away any trapped fibers and ensure clear passageways for juice.
- Regular Deep Cleaning: Periodically, give your juicer a more thorough clean, perhaps soaking parts in warm soapy water to dislodge any mineral buildup or sticky residue.
- Dry All Parts Thoroughly: Before reassembling and storing, ensure all components are completely dry to prevent mold or mildew growth.
Understanding Juicer Settings
Some advanced slow juicers offer different settings or speeds. If yours does, experiment to find the optimal one for various types of produce. Lower speeds are often recommended for softer fruits and leafy greens, while a slightly higher (though still “slow”) speed might be effective for harder vegetables. Always consult your user manual for specific guidance.
“The slower the speed, the better the juice quality and yield, as less heat and oxidation occur, preserving vital nutrients.” – Reviewpds.com Admin, Slow Juicer Expert
By implementing these practices, you’ll not only extend the life of your appliance but also consistently enjoy higher quality and quantity of fresh, nutrient-rich juice.
Conclusion
Testing the juice yield of your new slow juicer through a simple DIY protocol is an empowering step towards truly understanding and optimizing your juicing experience. By consistently weighing your produce and extracted juice, you gain valuable insights into your machine’s efficiency and your own technique. This knowledge empowers you to make minor adjustments that can lead to significant improvements in yield, ensuring you maximize nutrient intake and minimize waste.
A higher juice yield means more vibrant, enzyme-rich beverages and greater value for your produce investment. Don’t just juice; juice smarter. Take the time to conduct these tests and refine your juicing process. You might be surprised at how much more your slow juicer can truly offer. What produce will you test first to unlock your juicer’s full potential?
Frequently Asked Questions
Why is my slow juicer producing very wet pulp?
Wet pulp often indicates inefficient extraction. This can be caused by feeding produce too quickly, overloading the juicer, using produce that is not fresh, or having a clogged screen. Review your feeding technique and ensure the juicer’s filter is clean.
Can I test different fruits and vegetables in the same batch?
For accurate yield testing, it’s best to test single types of produce (e.g., only carrots or only apples) in a batch to get a precise yield percentage for that specific ingredient. For daily juicing, however, mixing fruits and vegetables is common and encouraged.
How often should I perform a yield test?
It’s recommended to perform an initial yield test when you first get your slow juicer to understand its baseline performance. After that, you can conduct periodic checks every few months, or whenever you notice a perceived drop in juice quantity or an increase in pulp wetness.
What’s the ideal weight measurement for juice yield?
For maximum precision in your yield calculations, using grams on a digital kitchen scale is ideal. Grams provide finer measurements compared to ounces, allowing for more accurate percentages.
Does the freshness of produce significantly impact yield?
Absolutely. Fresher produce typically has a higher water content, which directly translates to a better juice yield. As fruits and vegetables age, they lose moisture, resulting in less juice extracted and often wetter pulp.